Showing posts with label wall hanging. Show all posts

Sunday, January 22, 2023

Simple Ways to Hang Quilts

It's been too long since I lasted added a post to this blog. It seems Covid and the changes we all went through over the last few years has had an effect on my interest in writing. With the new year just beginning, I'm planning to add more posts without such a long stretch between. 

As a quilting teacher, I've found that making small quilts as samples is very useful. They're much  easier to store and transport. Many of them have become favorites that I display around our home, changing them out by season or theme. When I inventoried my quilts during 2020, I discovered I have over 70 wall-hanging size quilts! 


Since we rarely change out the quilts on the beds, keeping the number of large quilts to a minimum also influences this trend of making small quilts. There are some quilts with sentimental value that come out on occasion. Some are strictly used as samples for classes or are part of trunk shows that stay in the various go-bags. But a majority of them are fun to pick from to display and also include in a recently added trunk show, "Think Small for the Wall" that is available in person or via Zoom. Around the house, my husband prefers that I not put more holes in the walls, so I've come up with some pretty cool and affordable ways to hang large and small quilts. 

Regardless of the size of the quilt, I nearly always add a hanging sleeve on each quilt. I do this not only to make it easy to hang them at home, but also to meet the requirements if I enter them in the county or state fair, or regional quilt shows that require sleeves. Even when I use them on the bed, having a sleeve on them doesn't make them any less useful as a quilt to cuddle or sleep under. 

 In our home, there is a long wall that extends from the front door in the living room to the back door in the kitchen. The doorway to the hall leading to the bedrooms is about in the middle. This entire space has a vaulted ceiling, so there is lots of high open space to display quilts! For these, we have two 80" long decorative curtain rods installed permanently and use custom PVC poles that my husband fashioned that we can easily lift the rods down and back up to change out the quilts. At our ages, getting on ladders to do so just isn't safe anymore, not to mention the furniture that is in the way of getting the ladders close enough to reach the rods.

My favorite way to hang most wall-hanging quilts involves block magnets, 5 lb Command strip refills, and steel strapping, all of which you can get at your local hardware store (think Home Depot, Lowe's, Menards, or Ace Hardware, etc.) and a couple of hair ties. At a quilt show several years ago I saw a product to hang quilts with magnets, but they were quite expensive! I was sure my husband and I could come up with an affordable way to do something similar. Our trip to the hardware store was successful indeed! 


The first thing to do is cut the steel strapping in half. I've used both the 36" pieces for small to medium quilts and 48" pieces for the medium to large quilts. I wrap the ends with 2" wide blue painter's tape to keep the ends from snagging the quilt when it slides through the sleeve. I take two hair ties and double wrap the two pieces of strapping. The two bands keep the pieces straight and only when one of the bands breaks, which does happen on occasion after adjusting the width several times, does it cause a problem. The two bands allows me to adjust the width of the strapping pieces to fit the various quilts. For wider quilts they get stretched out, but always have an overlap with the two hair ties spaced out. When I hang the smaller quilts I slide the strapping pieces back together with the hair ties at the ends. It's nice to have them adjustable when swapping out wall quilts of different widths.

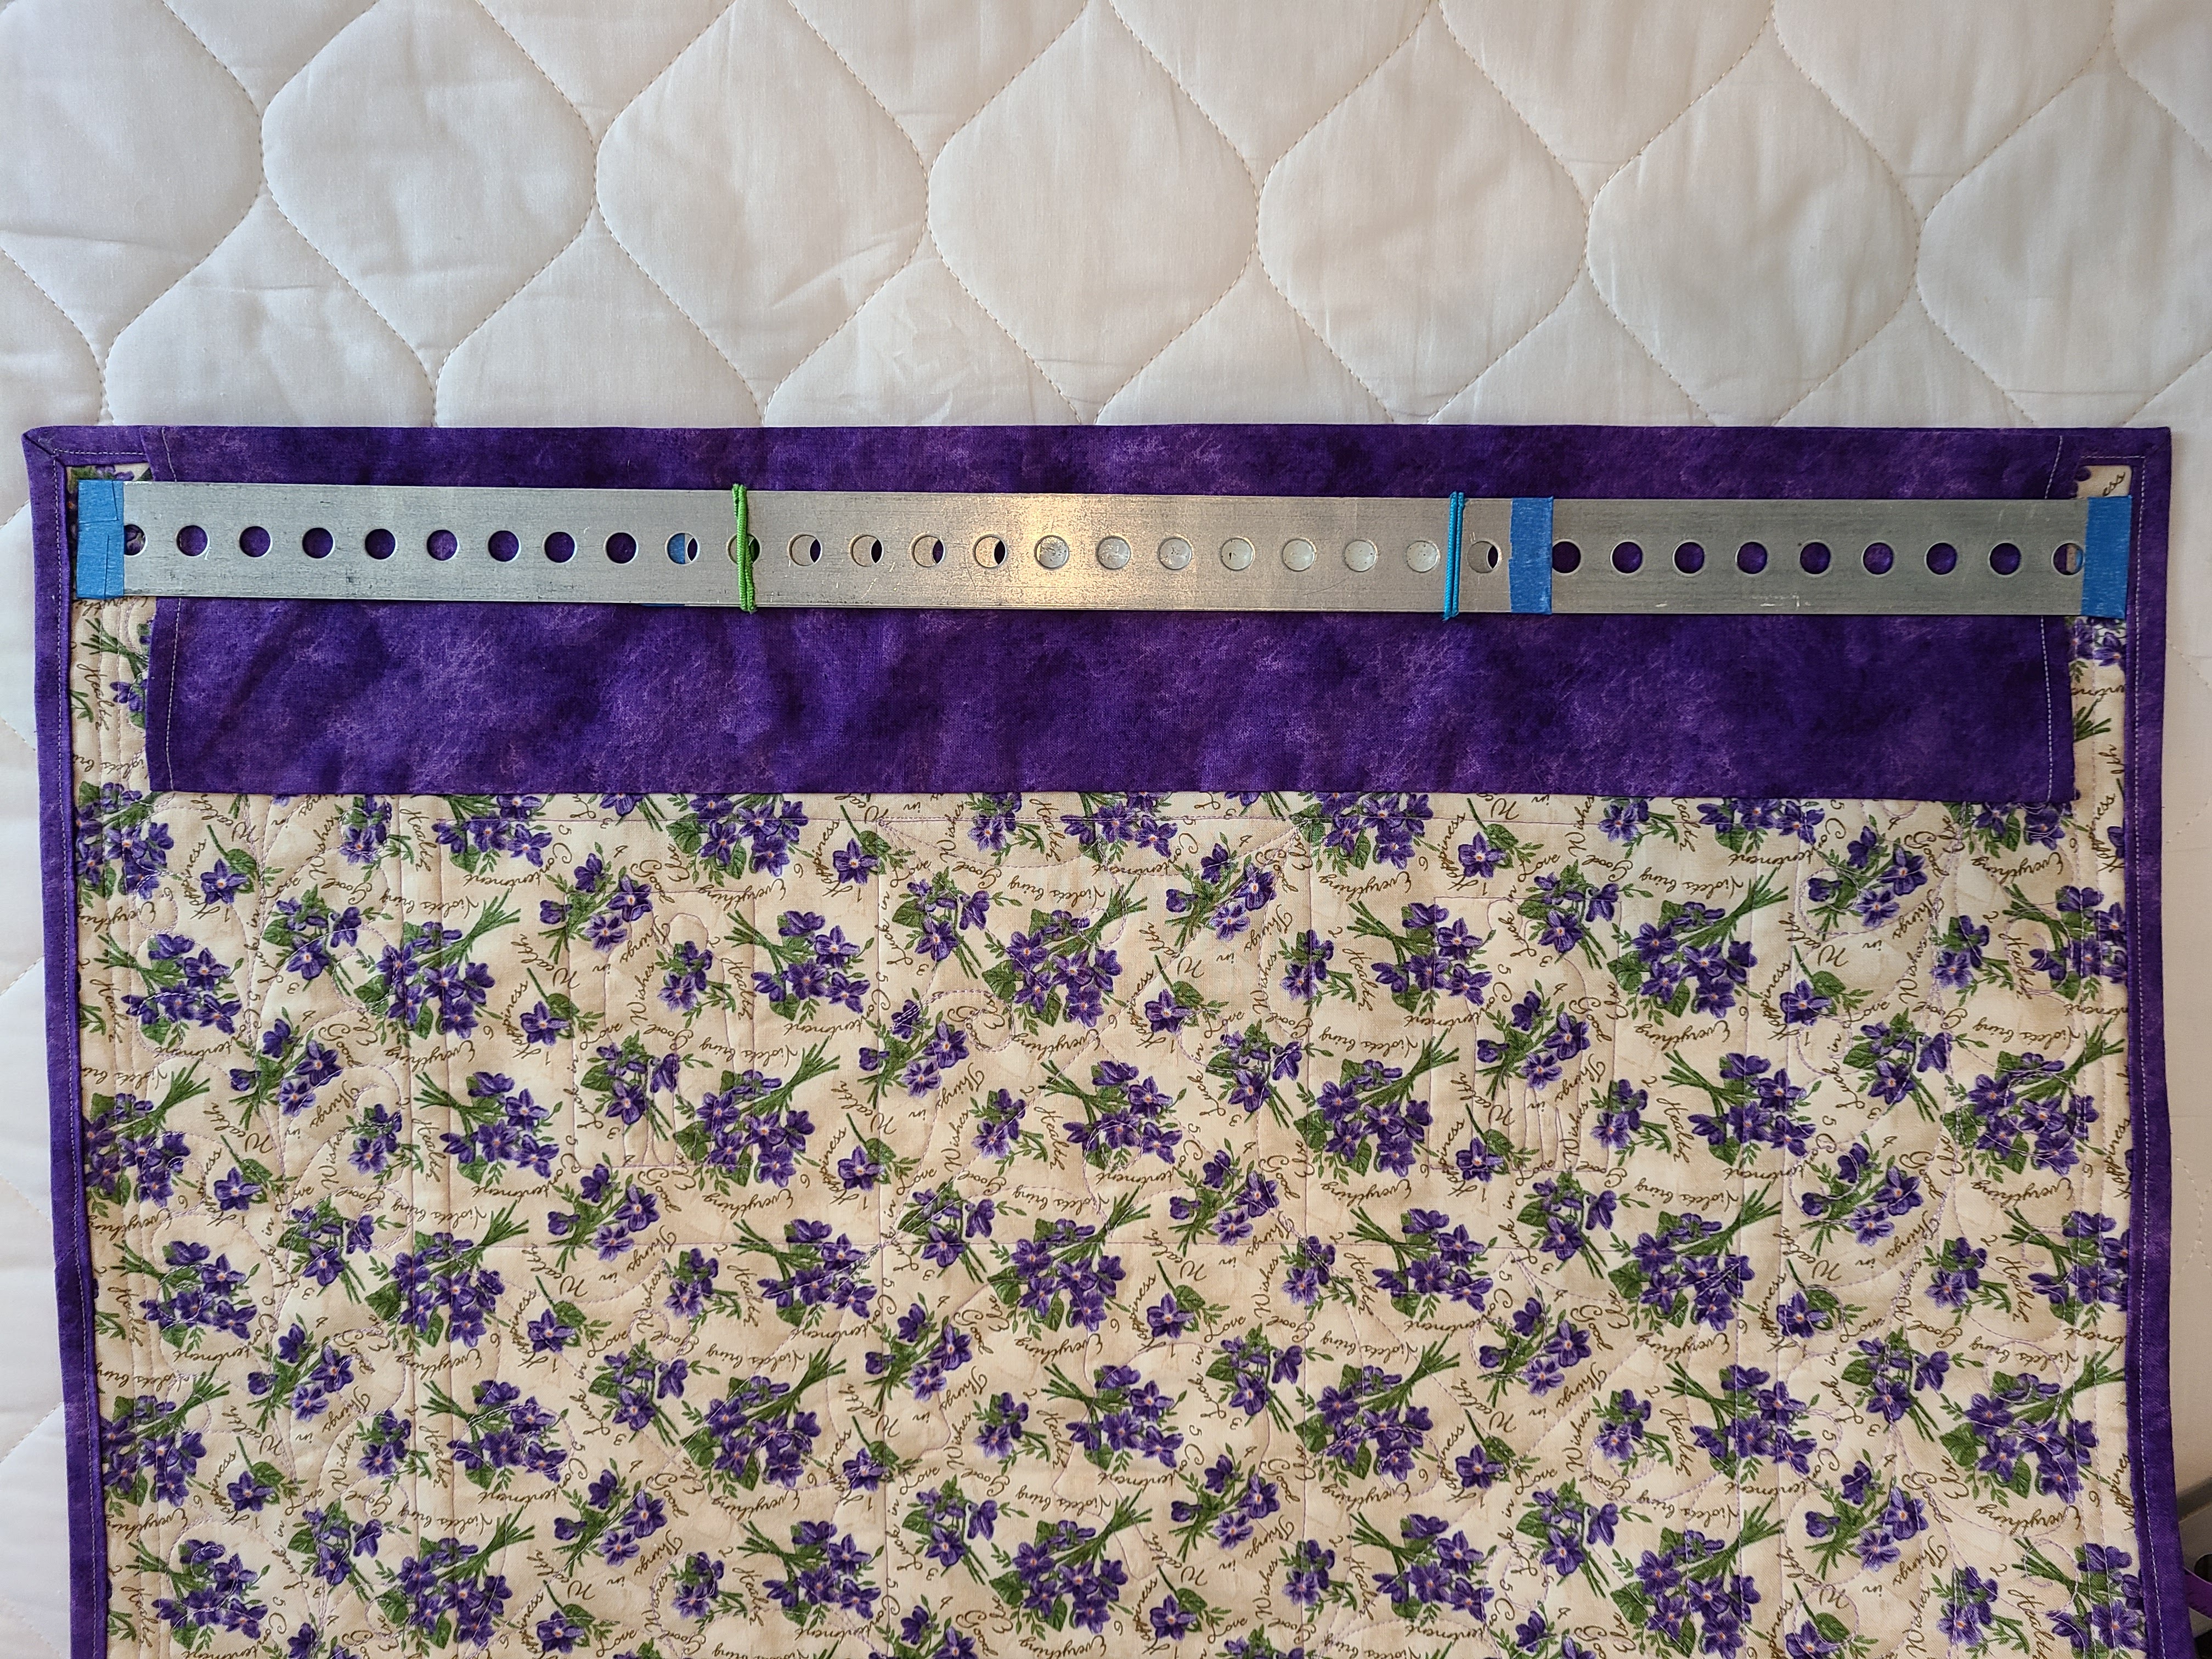
 

The next step is to clean the magnets with alcohol so they will stick well to the Command Strips. I also clean the wall with alcohol where I'm going to place the magnets. The 5 lb Command Strip refills seem to work the best as they are designed to carry a heavier load. I place 3 magnets on the wall so the weight of the quilts is distributed to hold them securely. I use a level to make small pencil marks for the placement of each magnet to make sure they are straight across so my quilts hang nicely. I leave the magnets, stuck to the wall with the Command Strips, to set for ~24 hours to let the adhesive settle before I hang the quilt. Once I'm ready to go, I slide the strapping into the sleeve and voila! The strapping grabs to the magnets through the sleeve and my quilt is instantly hung! And there are no holes in the wall!


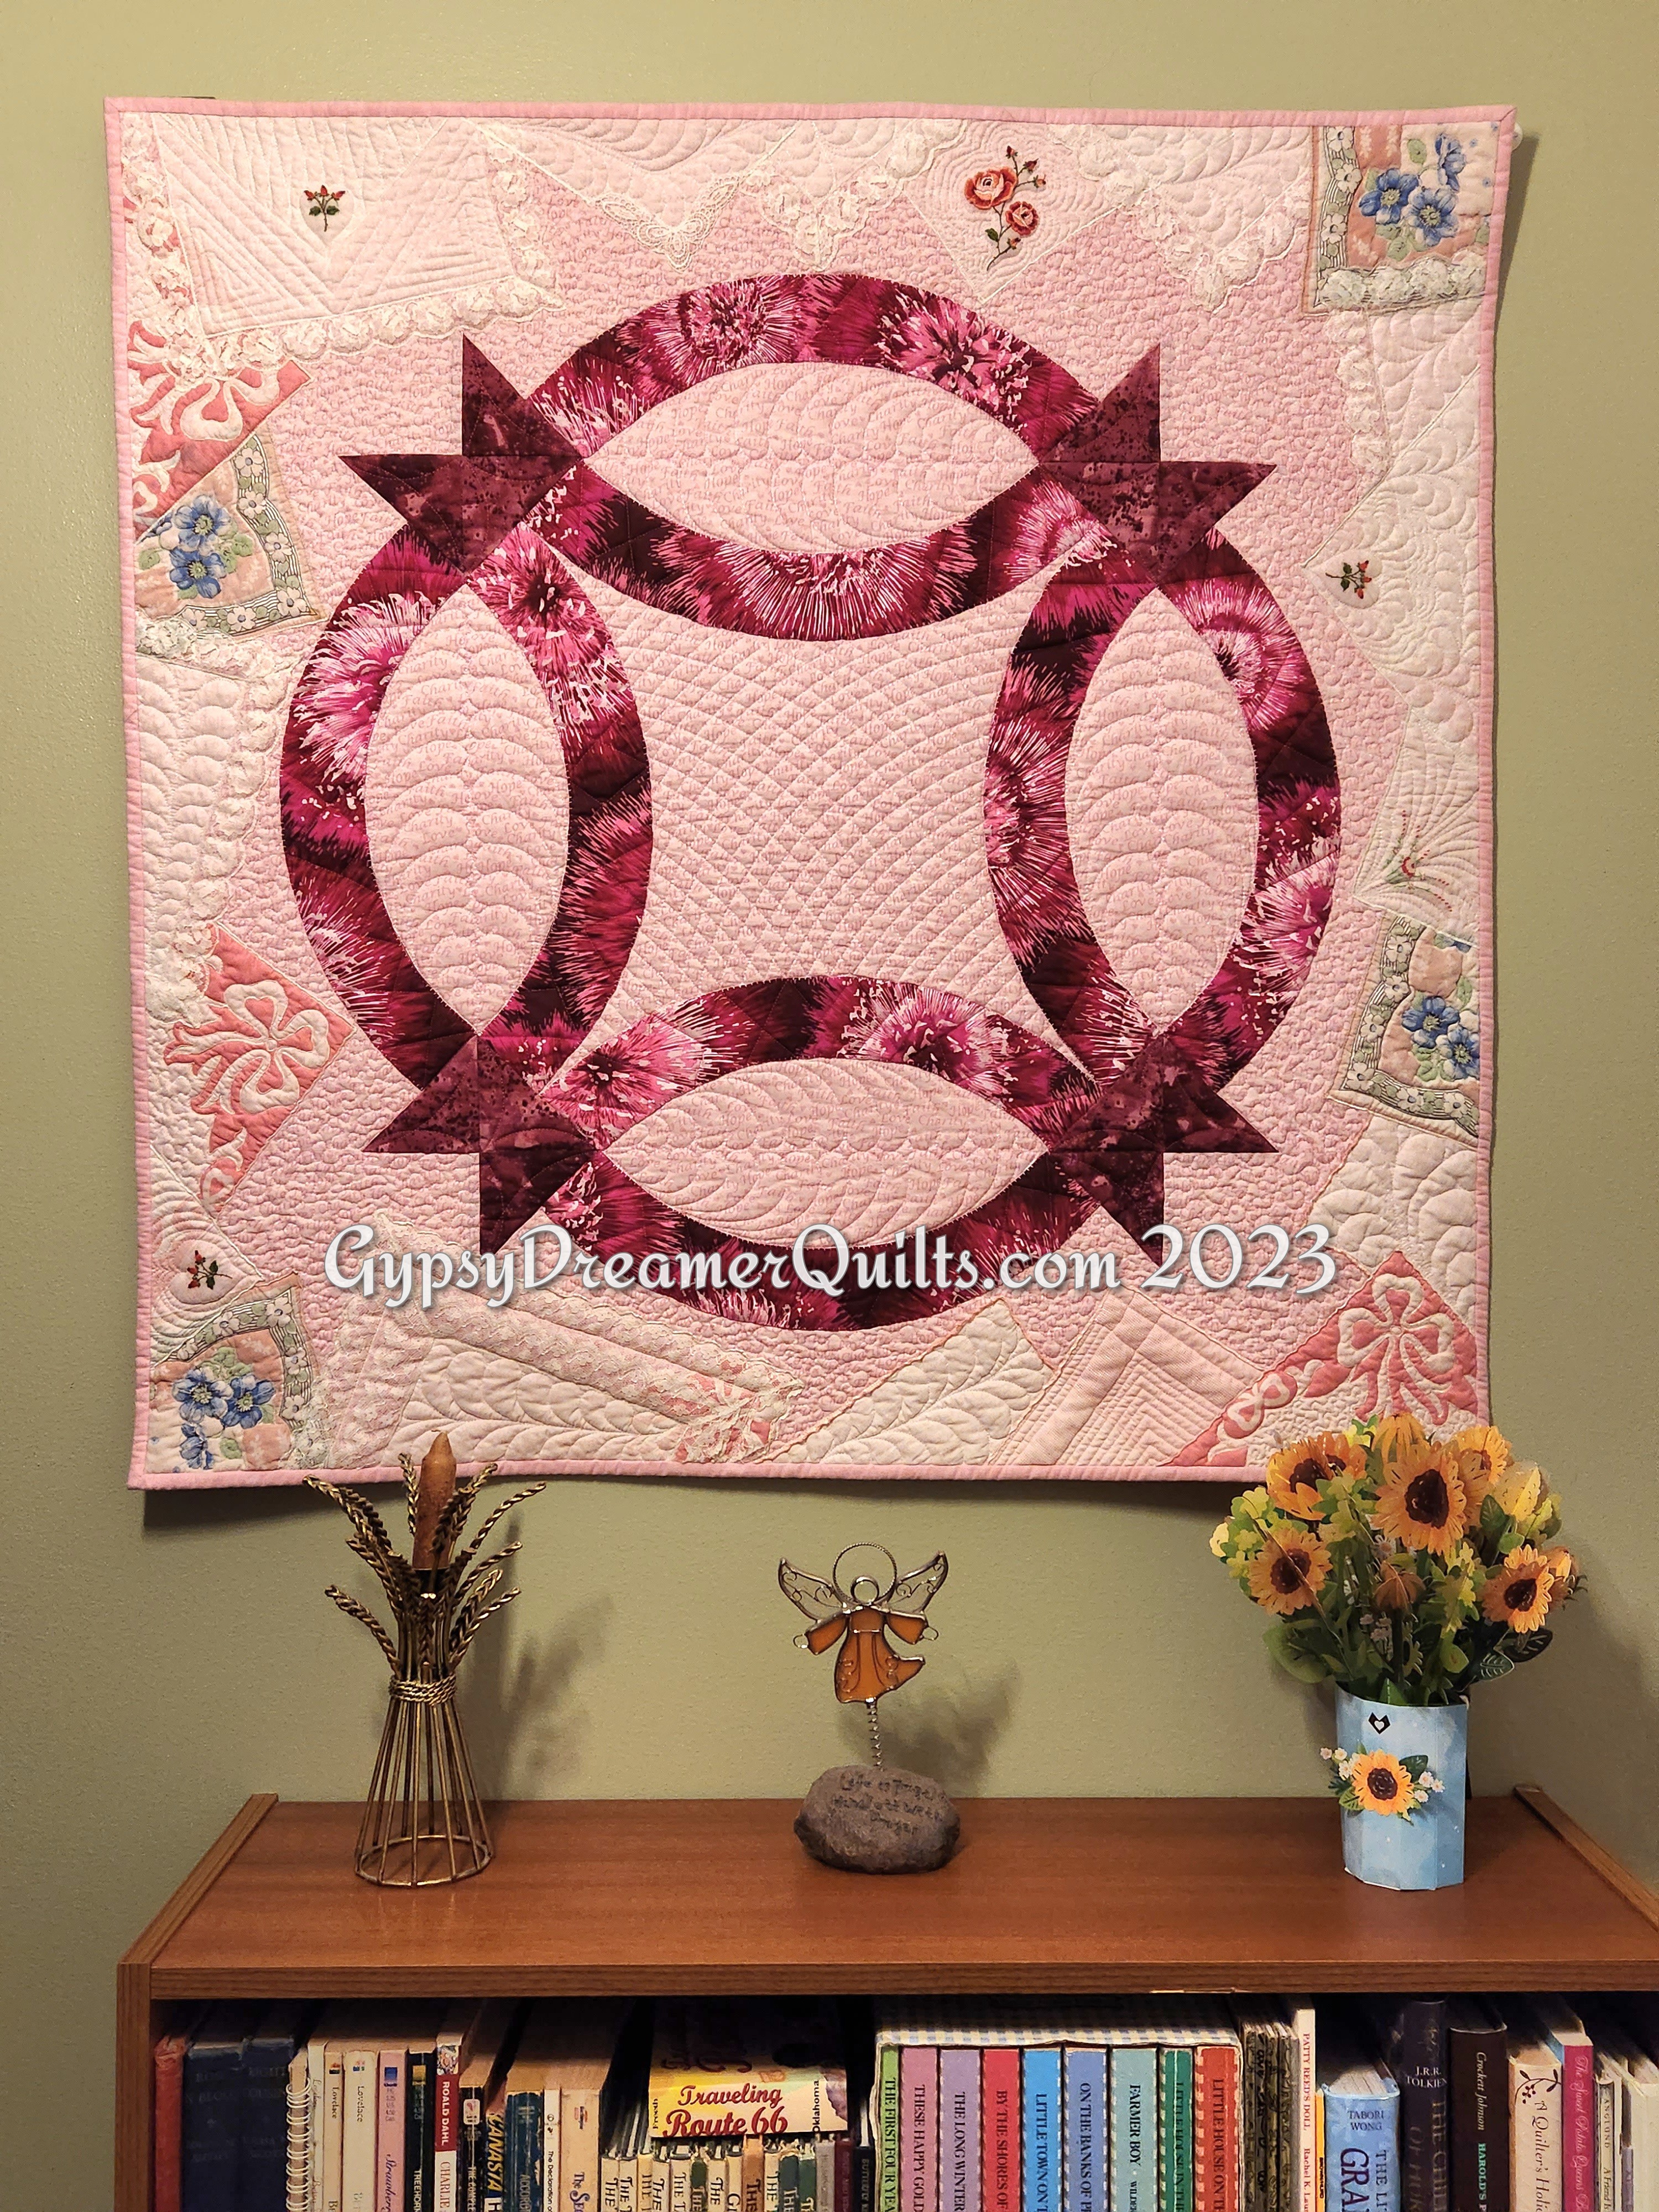
I have quilts hung this way in several rooms of the house and love being able to change them out and enjoy them year around. The set of 3 magnets hanging near the front door have been in place for several years now and are still holding strong!
 

Another way I hang mini quilts (up to ~20" wide) is with these cute little wooden quilt hangers. These were made locally and sold on commission through an area quilt shop. The wood rosettes on either side have mini clothes pins under them that grab the quilt at the binding and hold it in place. There's a picture hanger on the back and a small nail in the wall easily holds them. Again, once I decided where these would be placed, I can change out quilts without adding additional holes in the wall. Just a single small nail for each hanger (I have 3 total--one 18" and two 12"). These hang in my sewing room, by the front door, and in the kitchen.

 
Whether you're hanging large quilts on decorative curtain rods or small quilts with decorative hangers or magnets, there are many ways to hang them without too much damage to your walls. I especially like the magnet idea for smaller quilts in dorm rooms or apartments where putting holes in the walls is frowned upon. 
 
I hope this has been helpful for you! 
 
More tidbits from the sewing room soon...
Liz

Monday, December 1, 2014

Life keeps getting in the way of my keeping up with my blog. I had great plans, but those were dashed by school assignments, another move, and many projects. I'm grateful for all that has been going on and hope to continue sharing here those changes.

First off, I've gained yet another grandchild! My oldest daughter and her husband have adopted a baby girl who missed sharing my daughter's birthday by just a few hours. Little Joslyn is just adorable and a true redhead! She's such a blessing to our family. With my son-in-law's older two girls, this makes six grands for me now. Big brother and sister, Joe (14) and Jordyn (11) are enjoying having Joslyn in the family, and little cousin Jacob (2-1/2) thinks she's pretty cute too!

Back to my quilting... Well, there have been too many projects to list as I attempt to play catch-up. One that I'm quite proud of is a set of wall hangings made for a friend to present as gifts earlier this year. I have been a member of Eastern Star for closing in on 40 years. I was asked to turn our Worthy Grand Matron's ideas into a quilted wall hanging for each of her officers. What began as a simple drawing came into reality and was duplicated 20 times! Everyone was so happy with them!


The design, made entirely of dupioni silk and shantung included a paper-pieced star with the points made in the five colors of the Eastern Star emblem, surrounded with ivory shantung which was machine embroidered and bordered in fuchsia and teal, the Worthy Grand Matron's colors for the year.


I was able to set up an assembly line for myself, making parts for each and assembling in what I think of as progressive chain piecing. Once they were all made, then I used 1/4" Steam-a-Seam 2 tape to seal the binding to the back before machine stitching from the front in the ditch of the binding seam.

Working with the silk was a challenge at times. I ended up adding a light weight fusible stabilizer to the shantung to make it more manageable. I also worked with a pinking blade in one of my rotary cutters to reduce fraying. It worked, but it sure did leave a lot of short little teal threads everywhere! My ironing board cover is still in need of some serious cleaning!

I have plans to write up instructions for these beautiful wall hangings, a task I probably should get to before I forget the details of how I went about it!
 
I made 20 total, 6 having already been presented when I took this picture. They measure 14" x 18" and were thank-you gifts for the Kansas Easter Star Grand Officers for 2014-2015. What a fun project to take a rough concept from my friend Donna and turn it into reality for her to present to each of her officers at their respective receptions!

My current project is another for this group--a special Christmas gift to the Worthy Grand Matron and Worthy Grand Patron (only two this time!) from their grand officers. They are nearly done, but can't be shown until after they receive their gifts next weekend. What fun being asked to create unique quilted items for my Star sisters and brothers. 

More snippets from the sewing room soon,
Liz