As a child I remember Dad getting home from work about 4:30pm and my mom having all of the ingredients set out on the kitchen table ready for him to begin the process as soon as he walked in the door. From beginning to end, it takes close to 8 hours to make yulekaga, so he would be lucky to be getting it out of the oven by midnight. My special job back then was to open the cardamom seed pods to extract the seeds, which were then placed in a small (and now very old) wooden pepper grinder that was kept in the spice cupboard for that sole purpose. I'd then course-grind the seeds into a small bowl that would get emptied into the bread dough at just the right moment as directed by Dad.
 |
| My dad getting ready to bake the annual batch of Yulekaga |
The recipe as given to me goes as follows:
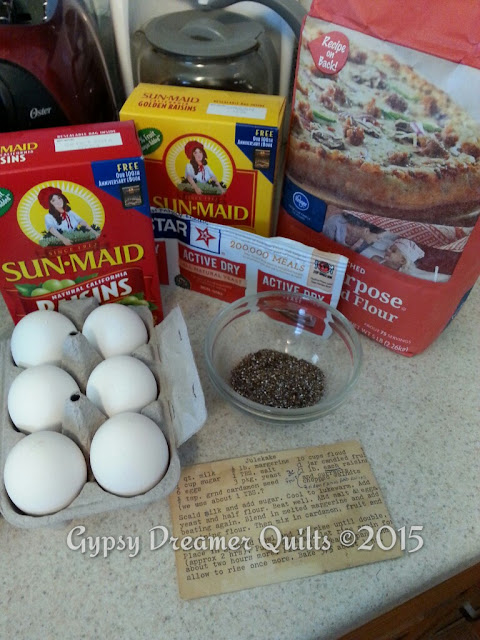
- 1 quart milk
- 1 cup sugar
- 6 eggs
- 1 Tbs ground cardamom seed
- 1/2 lb butter
- 1 Tbs salt
- 3 pkg yeast
- 10 cups flour
- 1 lb candied fruit & peel
- 1 lb raisins
- 1 lb golden raisins
Place in greased bowl and let rise until double (approx 2 hours). Punch down and knead, put back in bowl and let rise again (approx 2 hours). Punch down and knead, divide into five equal parts and place in greased loaf pans and allow to rise again (approx 2 hour). Bake at 350 for ~1 hour.
 |
| Gathering the ingredients for the first batch of Yulekaga of 2015. |
After comparing recipes with my cousins, it turns out there are variations. One uses condensed milk instead of milk as I've found in several online recipes. Another variation is how it was baked. My dad's brother always put the dough into the old metal coffee cans and baked tall round loaves instead of using purchased loaf pans. However it's made, I'm grateful several cousins are also continuing our grandparents' tradition.
I've made this recipe so many times now that I have it memorized, so when I get to the grocery store I can easily grab what I know is missing from my pantry on baking day. The only limitation to making it is that the candied fruit and peel is only available from just before Thanksgiving through Christmas. Once it's gone, it's gone until the next winter holiday season. The last few years of my caregiving time, I purchased several extra tubs and put them in the freezer so I could make it anytime so Dad never ran out. Having a slice of toasted and buttered yulekaga with a cup of coffee was his favorite mid-morning snack.
 |
| Blending the ground cardamom into the batter after the first half of the flour is added gives a better flavor distribution. |
The only thing I have changed on the recipe is when to add the ground cardamom. Instead of waiting to add it with the fruit, I add it after the first half of the flour is added to the batter. It gets distributed throughout the dough much better than waiting until after all of the flour is added.
 |
| The dough doubles in size each of the three times it rises--twice in the large bowl and once in the loaf pans. |
 |
| My loaf pans include the one my mom used to make and cut her fudge. Do you see the score marks? |
The loaf pans I use include several that my dad used that had also doubled as fudge pans for my mom. There are still knife scoring lines in the pans where she cut the fudge.
 |
| Dough has raised a third and final time in the individual loaf pans and is ready to bake! |
Tonight I set the timer and brought it in the living room so I would hear it. It's a new one as my old one died. Well... this one doesn't work either. It never dinged... at all... I was sitting in my rocker reading bedtime stories to my 3-year-old grandson and after the last book realized I didn't hear the timer ticking. I got up to look and it had stopped at 0 without making a noise! Yikes! I went into the kitchen, opened the oven, and discovered that the baking time for this batch was exactly the length it took to read four bedtime storybooks. Perfect timing!
 |
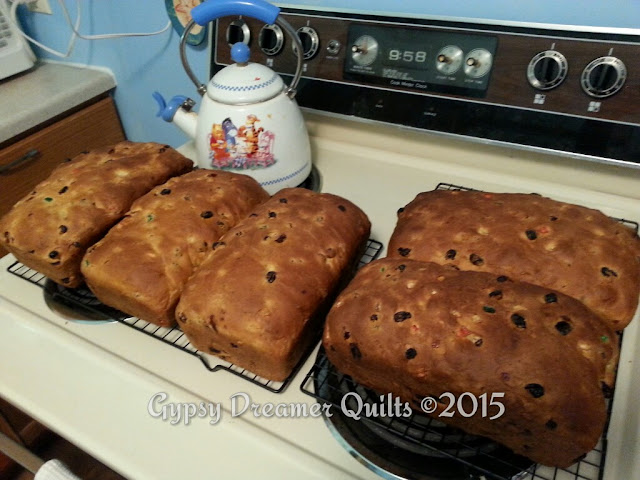
| Freshly baked loaves of Yulekaga are cooling on racks, waiting to be bagged and frozen until gifting. |
The bread is cooling and will be double bagged and put into my freezer until time to gift it.
After a fun evening of playing with Mormor's wooden train set, Jacob is sound asleep on the makeshift bed of couch cushions. He was perfect company this evening and we plan on having a wonderful play day together tomorrow. We will start our day with a piece of toasted yulekaga for breakfast as promised by Mormor at bedtime.
More snippets from the sewing room soon,
Liz


Beautiful story Liz. Makes me wish I had a slice. Such fond memories you have, thanks for sharing😊
ReplyDelete